Though it may not seem like it, I am actually leaving quite a bit out LOL!!! Hardly mentioned the electrical! Ok, where was I?
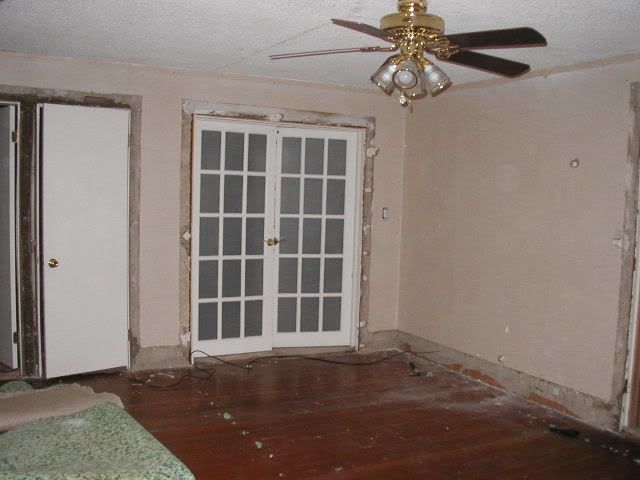
With the new door installed, we got a better idea of what the space was going to be like. We also realized that if we moved the door to the front porch, we could segregate the kitchen area a bit, and have a breakfast bar, another neat thing my husband always wanted. Unfortunately this put the flow of traffic too close to the wood stove. We tried several different scenarios as to where to put the wood stove, and even though we already had the chimney opening framed in, we decided to move the wood stove. It’s not that hard to patch a hole in the wall, even if it is an exterior one.
The next idea was to put the stove in the front porch. But then it wouldn’t heat much of the rest of the house, but if we opened up the wall – say about 7’ wide . . . Hey, that would work! That meant not only did we need to open up more of the old living room, we needed to start on the porch also.
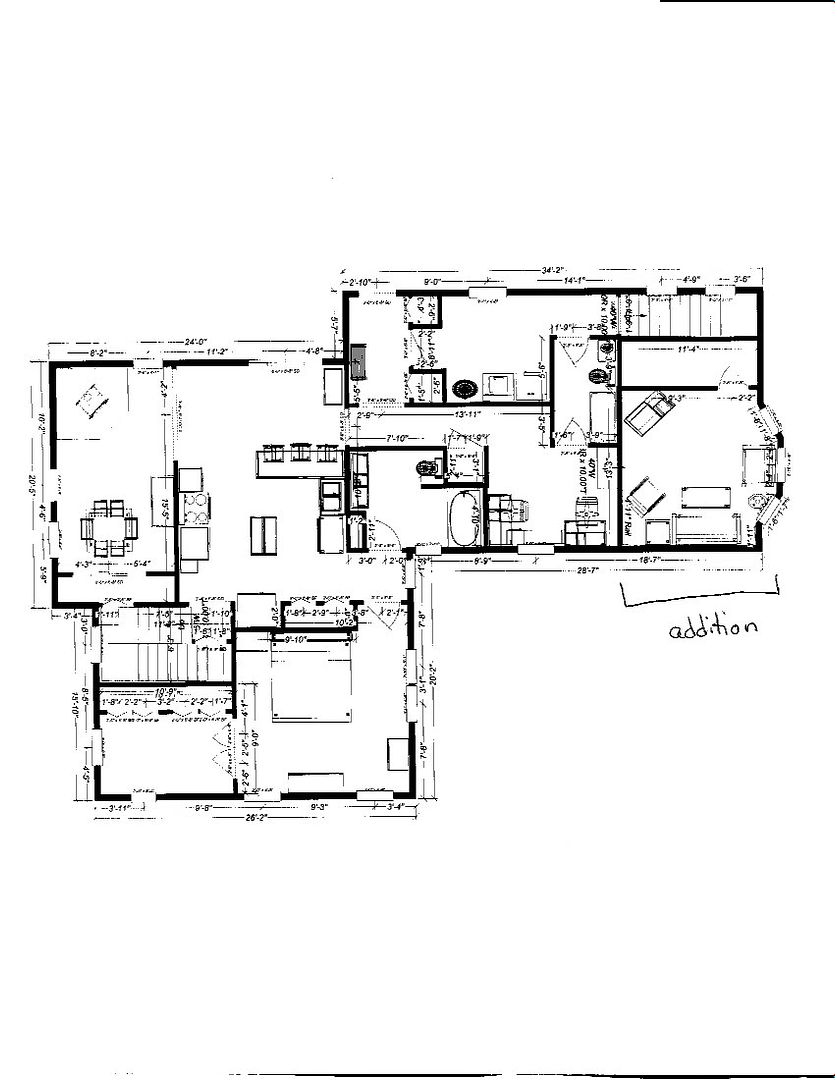
This was the basic layout, showing the larger opening into the den, and the location of the woodstove in the corner. This "version" shows the den being the dining room, but we changed that later. The laundry room/entry way is what we ended up with, but there have been changes to the bathroom layouts. This is also the plan after we started on the addition, and had to make major changes because of - well, I'll tell you about that when we get there.
I had taken the week of Thanksgiving off – promised to do some hunting with my husband, so that seemed like a good time to get started. I figured if we worked hard, we should have the kitchen done by the time we started the addition in the spring (wishful thinking on my part . . .).
Moved all the living room furniture out of the living room. The small bedroom upstairs was now full of boxes, the small bedroom downstairs got turned into the TV room. And we moved as much into the bedroom as possible (wall to wall furniture). We crammed the computer desks next to each other in the porch, and went to work.
I hung plastic up to keep the dust out of the rest of the house (as much as was possible). Removed the carpet and found a nice pine floor.
Hubby said he didn’t want to save the floor, so I didn’t worry about dropping chunks of the ceiling on it.
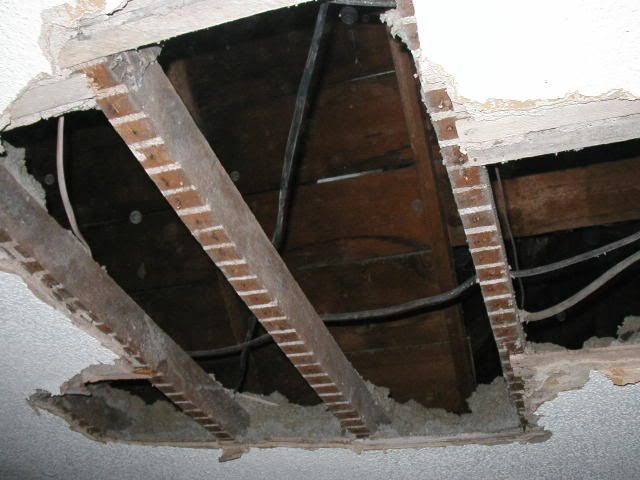
We literally hauled two tons of debris out of that one room – the dump charges by the pound.
We have found that things work a lot better if I do the demo work. My husband does not have the patience for that (or painting). Did you know you can shred a 2x4 with a claw hammer if you get mad enough? My husband is very good at a lot of things, but not that.
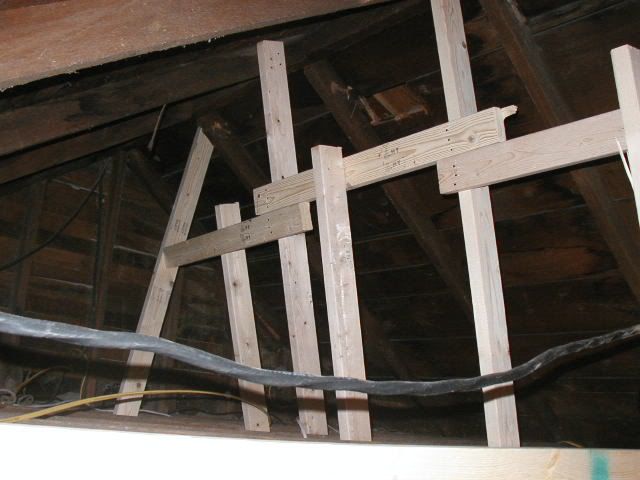
We had to replace a couple of the ceiling joists, as they had been cut and patched around old chimney openings. This roof had two of them.
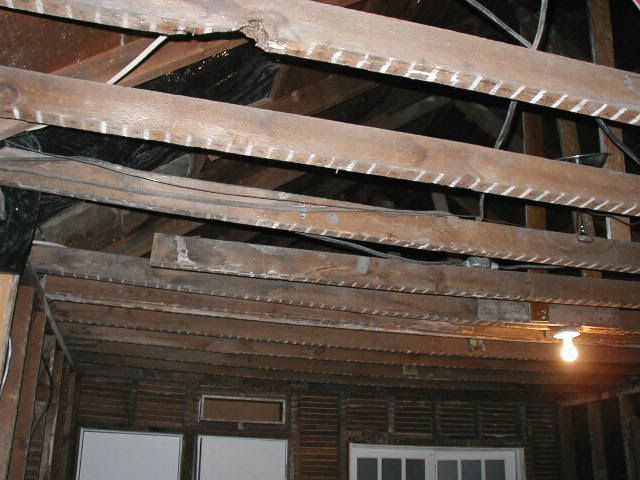
Once we had that done, we had another problem. The old joists were sagging, and new ones were not . . .
If I had to do it over, I’d replace all of them, but at the time we decided to brace them back up. We nailed braces between the rafters and the joists, and used a 2x4 to force the joists back up in position. It actually worked quite well.
Keep in mind, it was now December in
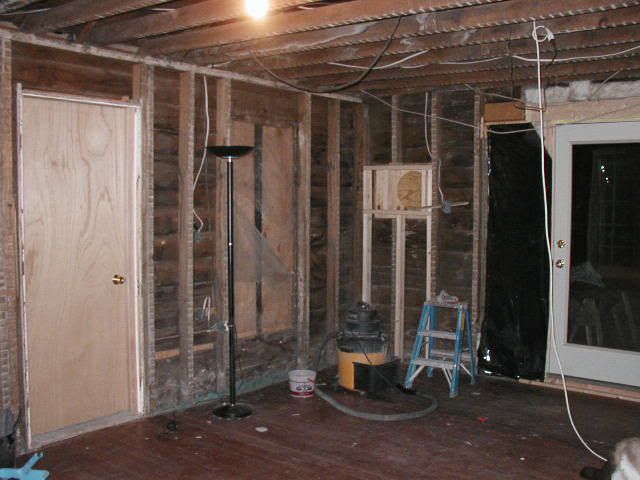
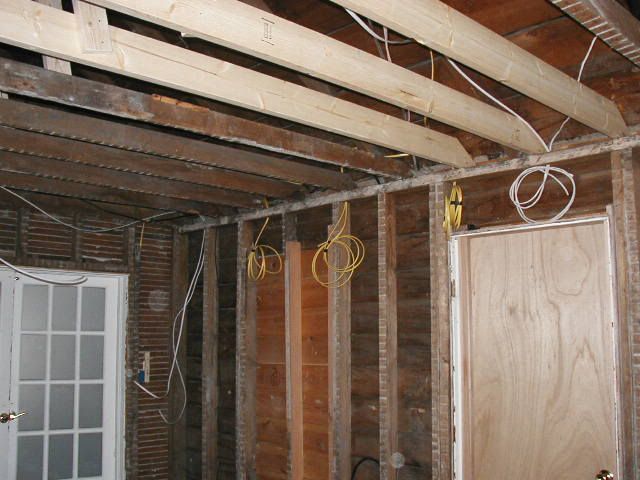
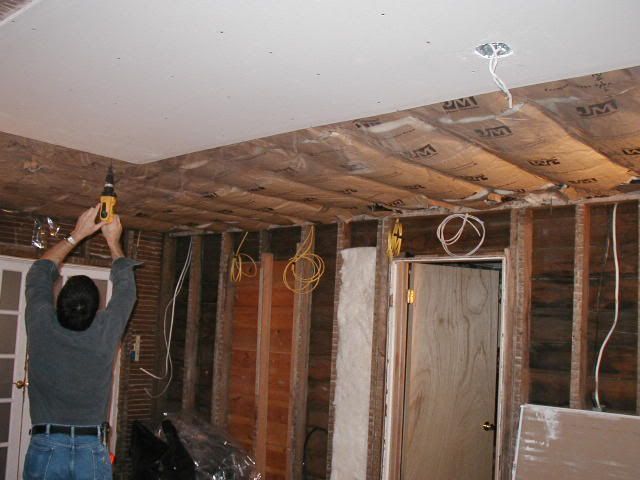
Once we had the joists in place, we put in the electrical and insulation, and put up sheet rock.
The wiring in this place is something else – We will eventually have it all replaced. Since the house was originally built without electric, most of the wires go across the ceiling and down the wall, not across the walls. That makes it easier for moving doors around.
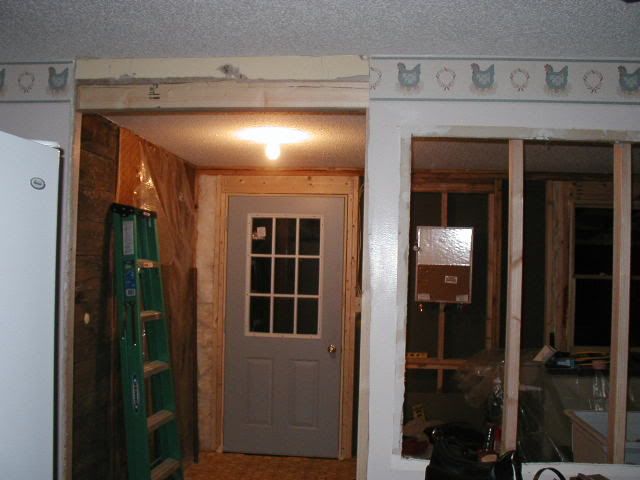
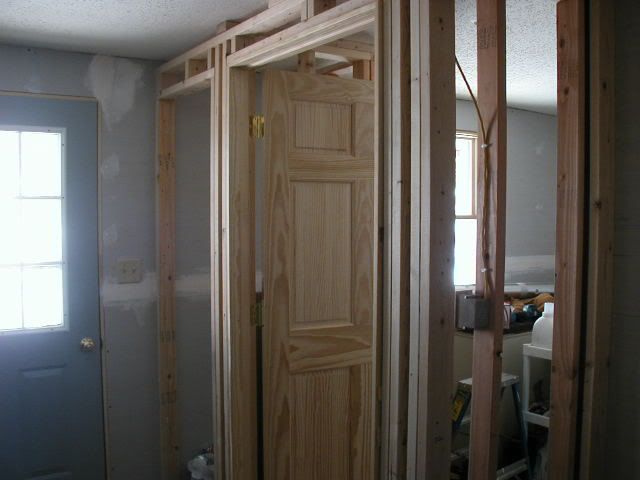
The next step was opening up the walls. The doorway between the old kitchen and the living room turned out to be sheet rocked over door frame (with no header, of course) Was only about 30” wide, so we planned on making it wider anyway. That one wasn’t a big deal, but opening up 7’ in the opposite wall was a bit more challenging.
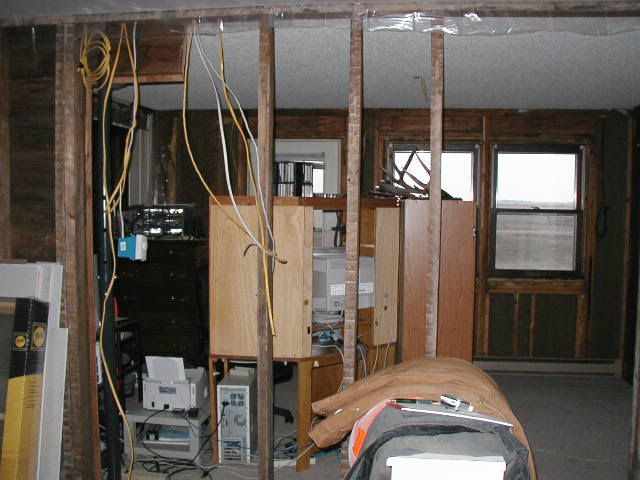
We had to remove the studs, and then fix the floor opening. The house is balloon framed, so we had to build a base for the jack studs to stand on. We used two screw posts to hold the roofline up while we removed the studs and prepared the opening for the header. We had everything ready to go, then removed the posts and pounded the header in place. We get one end up on the jacks, then stick one jack under the other end at an angle (so it will fit) and then pound it until it is upright and in place. The roof line had been sagging for some time, so it took a bit, but we finally got it.
Boy, I’m getting tired just thinking about all the work we did! Once we had the opening done, we got to work on the corner of the porch for the wood stove. This meant taking out the windows on the east side, and putting in a smaller one on the south side. We removed the sheetrock to the door, and finally found our first REAL HEADER! They almost had one over the east windows, but they had a stud going up the middle between the two windows, so though the outer edge of what should have been a header was sitting on jack studs, the inner edge was supported by the window frame. No wonder those windows didn’t work right!
We put cement board on the walls
and Z-brick
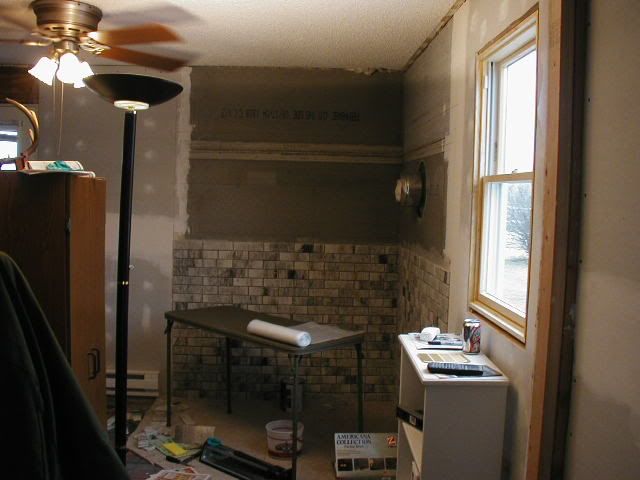
Put grout up (what a mess!!!!) and then spent a couple of days trying to get the haze of the brick. Won’t do that again. Got it looking decent, then put the cement blocks on the floor. Then my husband took over (he also does not do tile). He put the stove in place and installed the chimney. Spent about $500 on the stove and another $800 on the chimney! That double insulated pipe is not cheap!
But it does look nice - and was a house saver a little less than a year later (Dec 2005) when we were without electricity for 10 days.

When we started this project, we expected my husband would be around a lot (works seasonal). Then his boss got a late season job and hubby was working out of town, only home on the weekends for the entire month of December. It was mid February before we were able to use the wood stove for the first time.
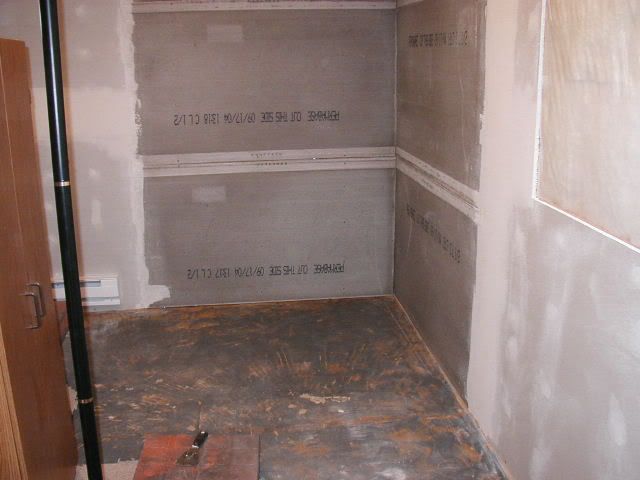
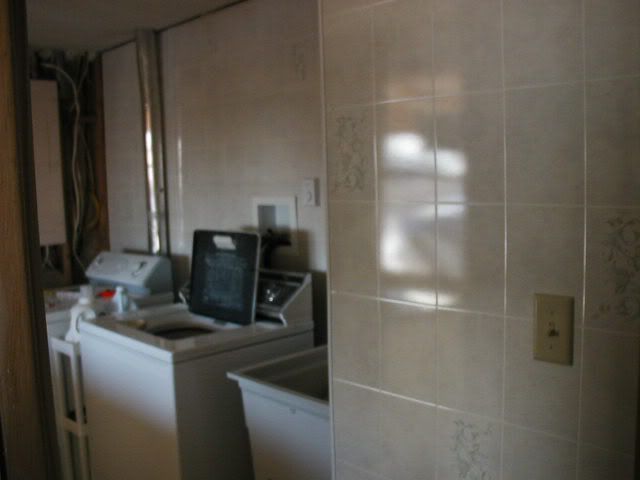
We were also working on the walls in the laundry room at the same time. Here are some pictures of the progress in the laundry room.
We were making progress and getting closer to our March 15th date for starting the addition . . .

