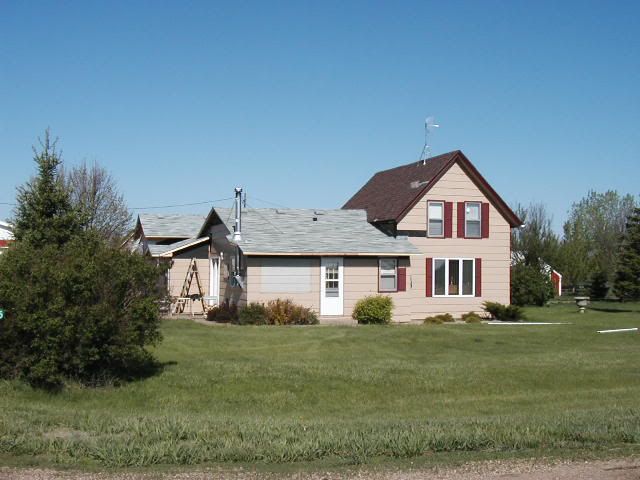
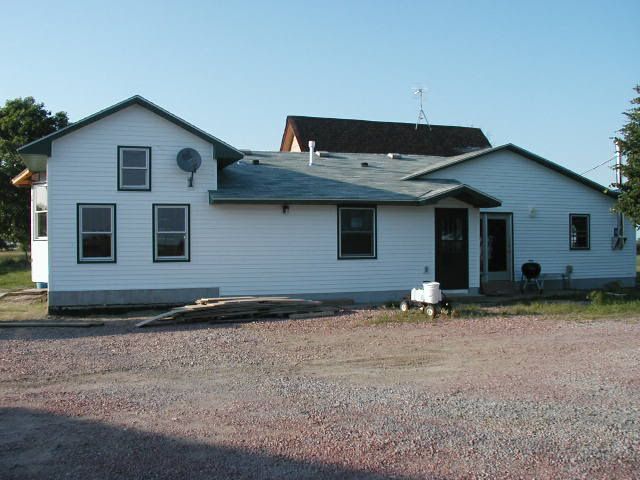
We’re almost done with the roof! YEA!!!!
Boy, I am almost getting as tired of writing about the roof as I was doing it!! It was more of the same stuff with the other sections, rip off the shingles (at least this part didn’t have shakes), put down tar paper and shingle. Wow, that makes it sound easy.
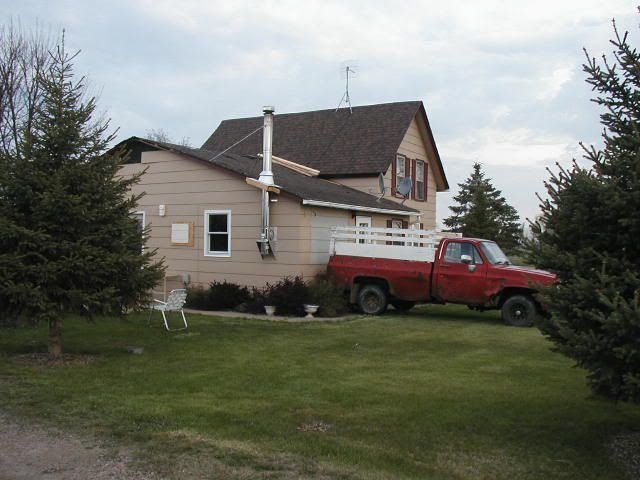
We backed the truck up to the house, and the removal went pretty well.
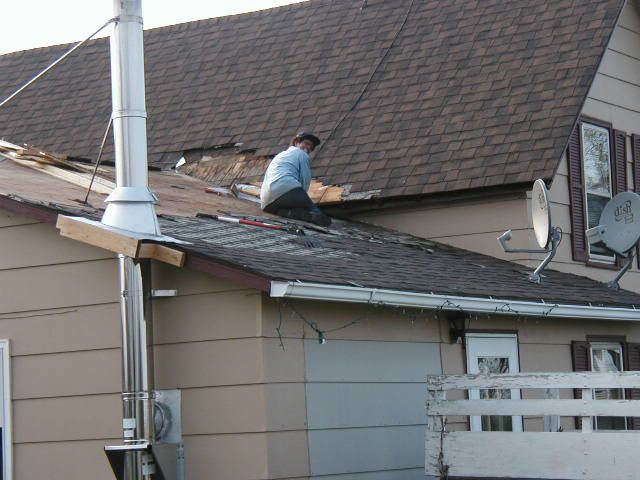
I took back the shingles on the upper section just far enough so we could replace the flashing. This also required taking off the old flashing and removing shakes underneath. Unfortunately the entire upper section has shakes under the two layers of shingles. And the over hang is framed at the level of the shakes, so we’ll probably be redoing that some time later this fall. Maybe in another couple of months we’ll feel like dealing with a roof again LOL!!
We did have to take down the chimney and reframe the overhang where it came up the side of the house. And we extended the front over hang out also. Not a problem, we were getting good at that part so we didn’t have to spend much time trying to figure out what to do.
I took Friday off work, spent that day tearing off old shingles, spent Saturday fixing the overhangs and putting up drip edge (and dodging rain) and then got up early Sunday morning and starting setting shingles. At about
I only managed to sit in the Black Jack roof tar once.
We sure breathed a sigh of relief to have the roof on. No more fighting with 24’ x 12’ tarps in 15mph winds. Folded them up and PUT THEM AWAY!!!!
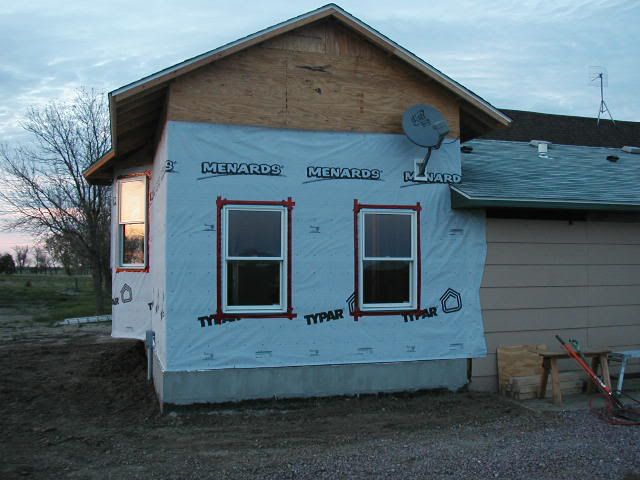
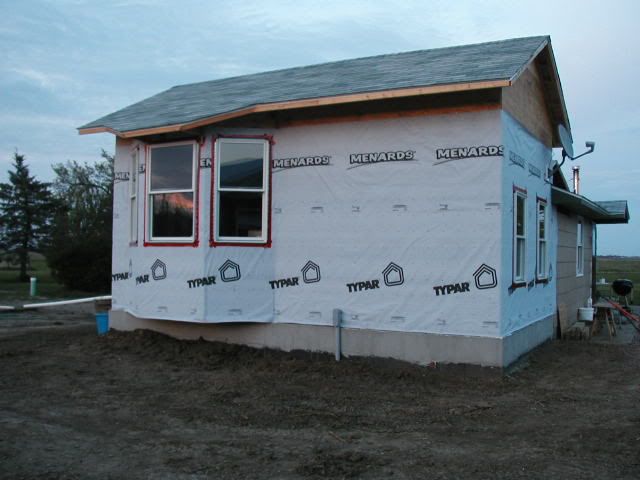
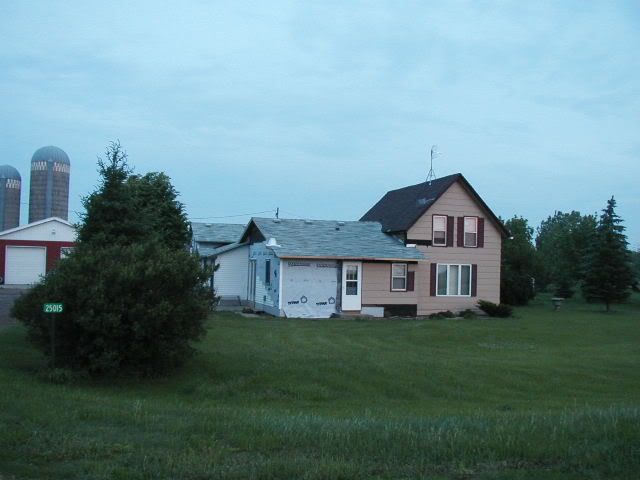
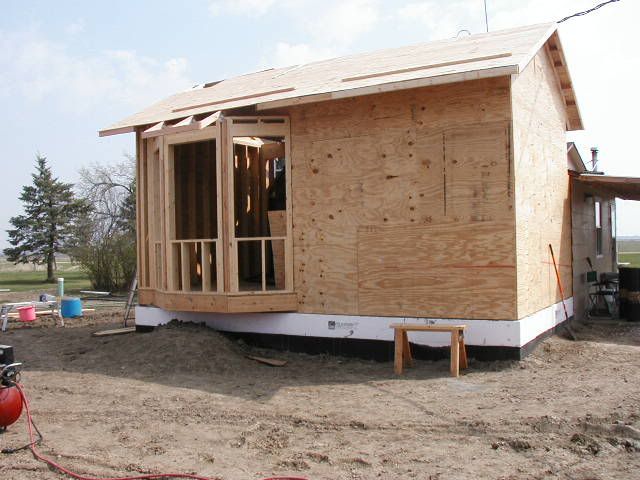
For our next trick – we put up house wrap and installed windows in the new addition. Worked on that the next weekend (May 15th).
It had taken us two months, but we finally felt we had things buttoned up enough for my husband to go back to work. When he first called his boss, boss said they were really slow and didn’t have anything. Hubby didn’t really believed him, but we knew we were taking a risk that his boss wouldn’t want him back if hubby took too long on the house. Oh well, there are other jobs, and spring is a good time to be looking. Hubby took a couple of days, and actually got two offers, and then his boss called and said “Come in Friday, don’t know what you’ll be doing, but there’s work!” Figure one of the other companies called his old boss for a reference, and his old boss got nervous LOL!! Nice to be wanted . . .
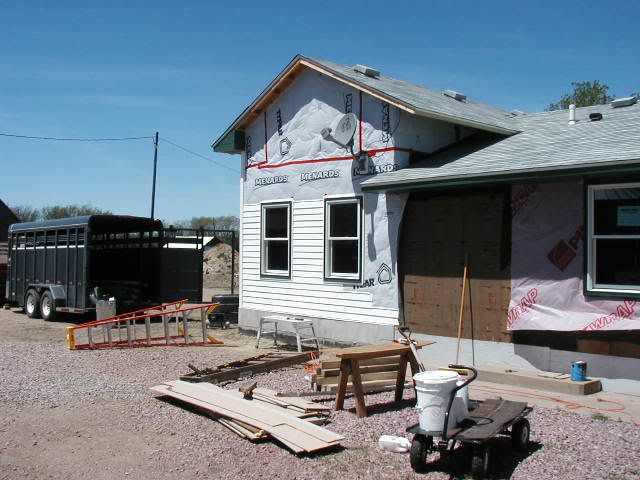
Once the windows and wooden trim was up, it was my time to take over. Siding is a bit too much like putting together a jigsaw puzzle, and things just work out better if I do the bulk of the work. So, for the next three weeks, that’s pretty much all I did.
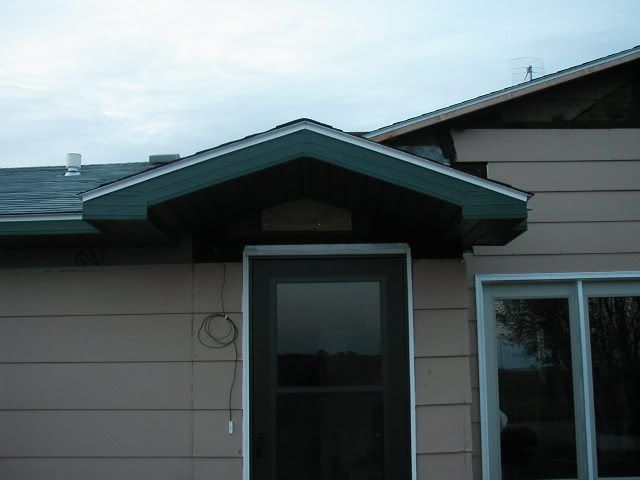
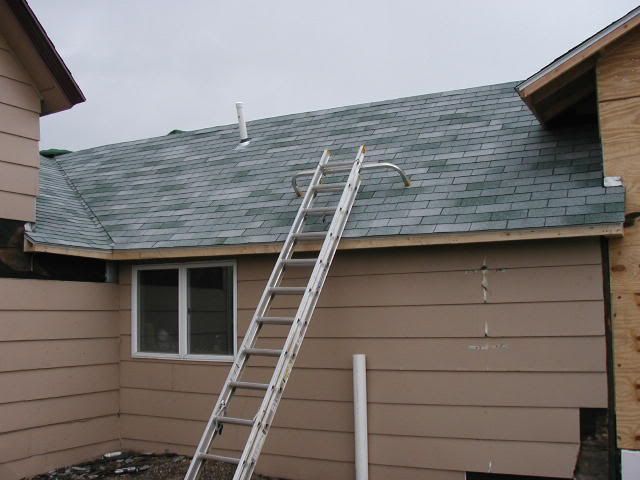
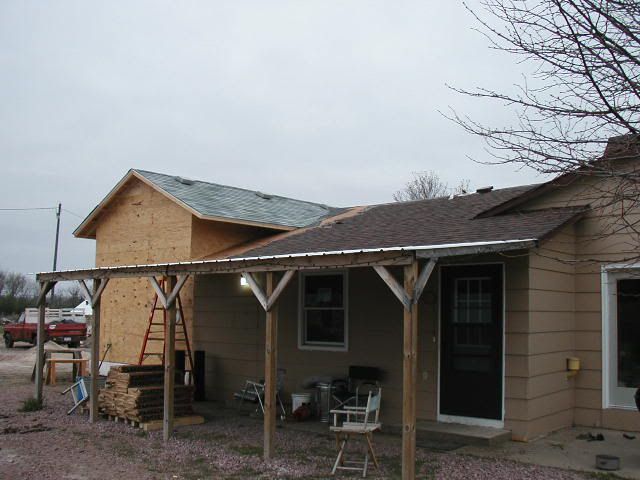
Here's the soffit finished on the overhang for the door.
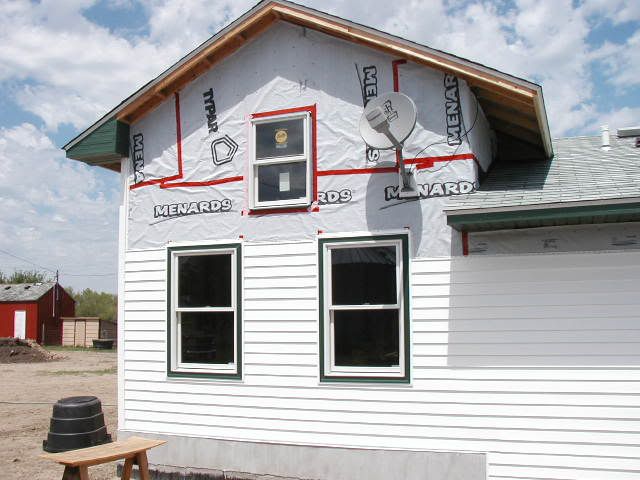
The addition and most of the south side went ok.
We put stained, green treated plywood at the base of the old section. It sort of matches the new section where we put stucco like stuff over the pink insulation. At this point, my hubby decided he did want that third window on the front after all. We have a large storage closet that goes above the stairwell, so the upper window opens into that small room, and the two lower windows give light in the stairwell and down into the basement. At least he made that decision before I got the siding up that far.

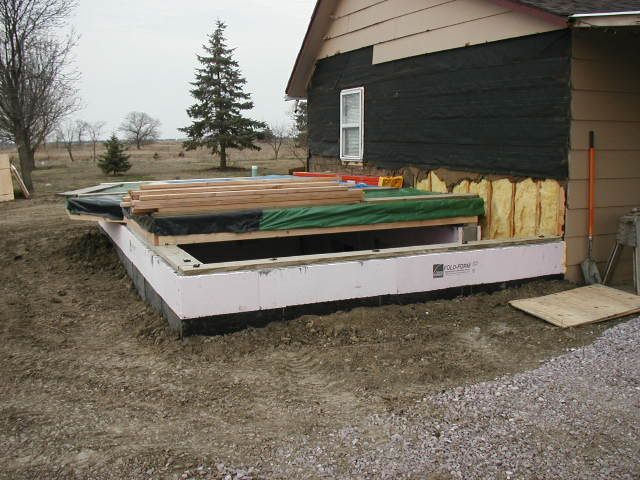
When we got to the east end, where the porch was added on, we found a lot of rot.
Ended up jacking up the front of the porch as best we could and replacing the sill plate and putting braces under the edge to replace the rotten floor joists. We also replaced the front door. Don’t have any pictures of that, which is a shame. Would have been interesting to take some with two tractor jacks under house. Too bad they hadn’t used green treated lumber in the first place (this addition is not that old) and had sloped the yard so the water would run AWAY from the house. Oh well, it’s the little things that would get it.
It was the middle of June, and we couldn't do any more siding until we moved the walls/windows around in the 2 story section. So we switched back to working on the inside.
¶ 7:56 PM 0 commentsThe valley – this was where we were supposed to end the job. Of course, we would eventually re-roof the whole house, but our goal was to only do as much as was necessary at this time to get things buttoned up against the weather, and finish later in the year at a more relaxed pace.
We where already 10 days past our deadline, and there was no end in sight. Just hoped that when hubby was ready to go back to work, his boss would be willing to take him back! Our situation is such that it wasn’t a huge concern, but he liked working there.
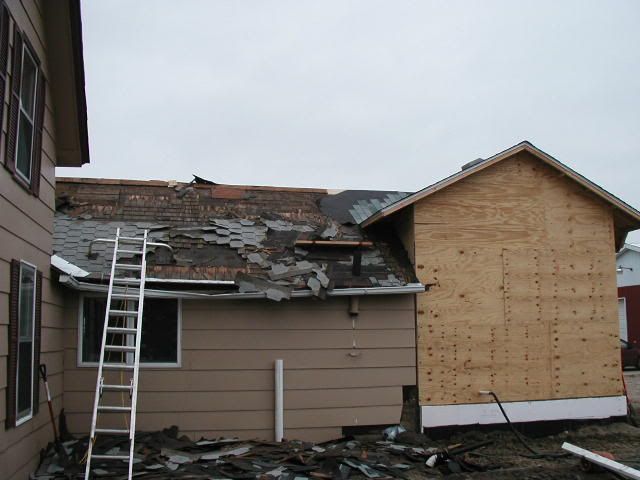
We were tearing off the old roof, and got back to the valley. We discovered two layers of flashing. When they re-roofed, they laid down new flashing over the old roof, and underneath was another layer of flashing, laid over the shakes. Since we were removing the shakes – the only choice was to remove everything! But if we removed the valley flashing, we had to remove the roofing on the adjoining sections, and if we did that we might as well do the opposing side of that section too. At least the two story roof only overlaps the section we decided to do by a little bit, so we could sort of “patch” at that part to make this work.
It did mean getting another load of shingles and tar paper. Oh well, it’s only money, and it does grow back (my daughter said that the other day, thought it was pretty funny. It may have taken her a bit, but she finally understands this basic concept “Go to work – Get a paycheck, Stay home – Don’t get a paycheck.).
Let’s see, we have the old roofing torn off all the way back to the two story section, and then we put ¼” sheathing over the north section after resetting the patches to the correct level. Since we had already connected the new section to the old roof BEFORE we decided to put the sheathing over everything, we used the old shakes as shims for the transition between the two levels. Worked pretty good, and at this point our level of persnikitiness was WAY down. Since I was back to work, we were doing the bulk of the work over the weekends. We’d start Friday afternoon, work Saturday and Sunday, and then I’d be calling in Monday morning to stay home cause we didn’t quite have things done yet! Glad my work is flexible! However, we did plan this for a time when I knew things would be pretty slow for me at work.
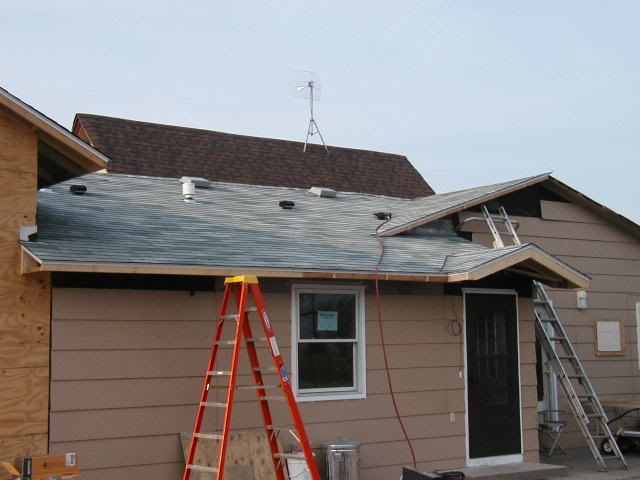
We also had to redo the overhang on the old roof. We extended it out and made it perpendicular to the ground so we could put regular soffits up. At some point someone got the idea to increase air flow in the attic so they cut holes in the existing soffit boards and installed vents. Too bad they didn’t check up in the attic, they would have discovered that the sheathing on the sides went right up tight to the sheathing on the roof. All that work to put in vents that were venting NOTHING. They had them like that all around the house . . .
We finally got that section of the roof done, and moved to the south side of the house. At least the rest of the roof on the lower section is between 5/12 and 4/12 pitch.
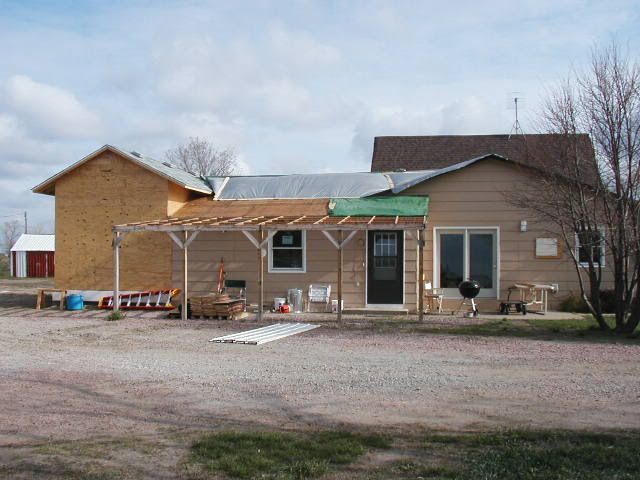
To make things fun on the south side, we had to remove the – heck, I don’t know what to call it! The previous owners had built a covered “lean to” type structure on the south side of the house. They removed the facia board on the overhang and braced 2x4’s along the roof rafters and extended them out 10’, and covered it with tin. In doing so, they had removed the drip edge from the roof. The new boards were resting on the soffit board, and nailed up through the bottom. This soffit board was only attached by being nailed to the underside of the rafters. It would not have been bad if they had extended the new boards into the roof so they were sitting on the wall, but that was not the case. Only the soffit was holding up the entire roof for the overhang.
It was nice having that shaded area in the summer, but it was so poorly constructed (in our opinion) that we would have had to rebuild it – and we didn’t like it THAT much.
At least it made a good shoot for sliding the shingles into the bed of the truck while I was removing them from the roof. And yes, I do mean “I”. I think I mentioned before that my husband is not good when it comes to demolition work, so I do the bulk of that. Besides, usually I was up early in the morning, and he was still in bed. He did have to make the dump runs. But that worked out too, cause I could have enough tore off by the time he got back to re-fill the truck for another trip.
We got the roofing off, put up the tarp, and went to work removing the lean to. It was now May.
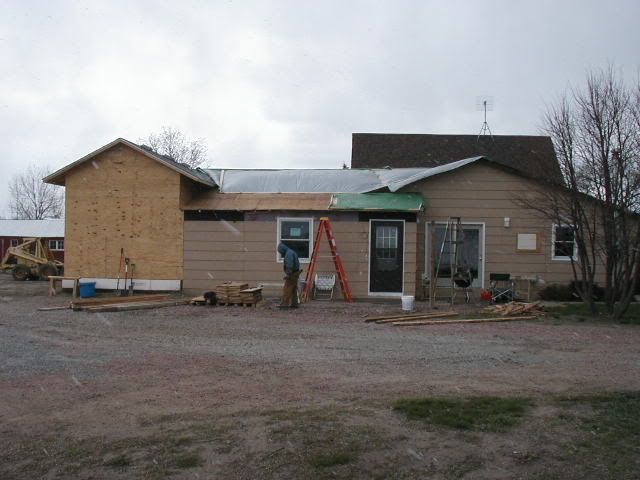
And yes, that is me in my carharts, and that white stuff is SNOW. It was 70 deg back in early March, but that is the way the weather is here in SD.
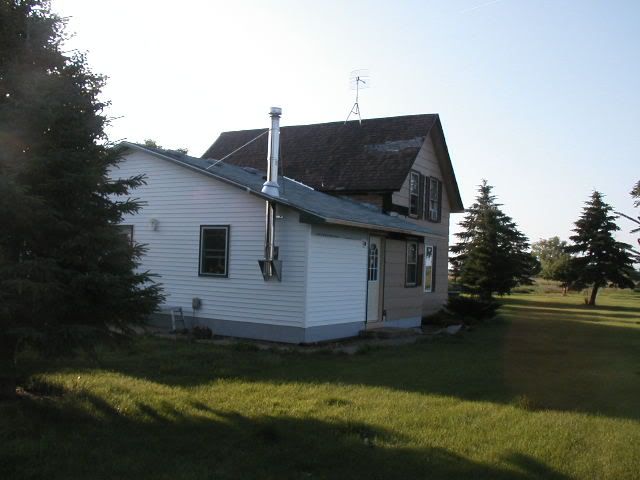
We had to redo the overhang on this side, and added a little “dormer” over the door. It might look pretty stupid at this point, but I have plans for a white picket fence and arbor, and lots of potted plants in front of the house. . . I keep telling myself it WILL look nice when we are done!
The never ending roofing project – which goes hand in hand with the never ending siding project.
As the pictures have shown, we had pretty decent weather during most of this project. Actually a bit warmer and dryer than normal, but that changed.
It turned cold, and it started to rain every couple of days. Windy too, and boy does that get to you while you’re up on the roof. My husband had told his boss that he wouldn’t be available while we were working on this project, and we hoped we’d have things buttoned up enough by April 15th so he could get back to work. We started March 15 – that gave us a month. Oh well, we’ve learned long ago we are usually too optimistic on our timelines! Doesn’t seem to stop us though.
I had taken the first week of April off, and after that was taking days here and there as needed.
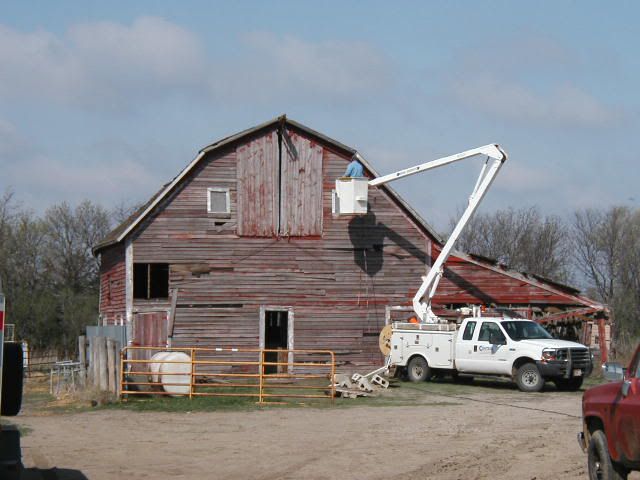
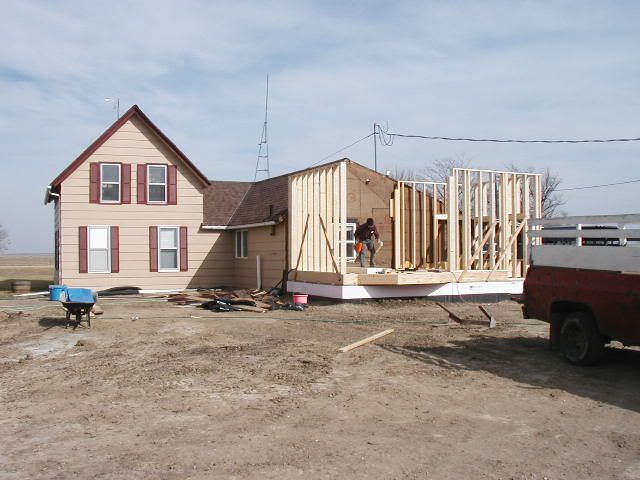
We did manage to get the addition framed and sheathed, and now it was mid April and we still had a ways to go. The electric company sent two guys out to rerun the power to the house
and we had them disconnect the power to the barn at the same time.
Once that was done, we got to work on roofing.
The new section wasn’t all that bad. And we didn’t have too much trouble with framing up the overlap from the old section onto the new one. We ripped back the shingles on the old roof where the new roof overlapped, and things looked pretty good. The sheathing under the cedar shingles looked decent, we figured that we wouldn’t need to sheath over that, so went ahead and framed where the two roofs joined, then got the new section roofed. We did have some difficulty with rain, and bought a couple of big tarps. We’ve had every section of the roof tarped at some point during this phase of the project.
We had planned on roofing the new section and re-roofing the old section up to the valley. Not a problem – just tear off the old shingles back to the valley pan and put the new ones down. Opps, forgot this is an OLD house!
We started running into problems as we finished tearing off shingles on the north (oldest) half of the old roof. This was the part where we found the cedar shingles. The previous owners had re-roofed the house in the not too distant path, but they used 1” nails, and they weren’t penetrating into the sheathing (two layers of shingles and a layer of shakes to go through) made it real easy to tear off. Bought a special shovel with teeth to make the job easier, and that was a real time saver.
On the back side of the house we used the skidsteer to haul the shingles to the truck, and then hauled them to the dump. The Mitchell dump is not that far away, so at least that made things easier. They know my husband by sight now, but there aren’t too many people driving beat up old ½ ton Chev (85) pickups. We tell people it’s done rusting.
When he got his new truck last year (94 chev desiel ¾ ton) the old truck was suppose to be retired. But you know how it is for mechanics – nothing is put to rest until it simply can’t be resurrected any more. He’s found it’s too nice having two trucks – one he can keep relatively nice, and one he can drive anywhere and haul junk in with out a care.
Back to the roof – the farther I got to the east end (and the valley) the worse things got. The sheathing (3/4 boards) was loose and rotted in areas, with big gaps between the boards. Someone had patched the roof in places (were chimneys had originally been) but patched at the level of the shakes, so the patches had to be replaced with something that matched the level of the sheathing. We were removing a layer of brown shingles, then a layer of white shingles, then the shakes. At one point the roof was red (that’s the color of the shingles over the section of the roof that was roofed over (changed the pitch) so we know the shakes had been roofed over at least three times.
Well, so far, not a major issue, we could continue with our plans – then I got to the valley.
¶ 7:54 PM 0 commentsBeen so long since I wrote about this, I had to go back to remember where I was – oh yea, we had a basement.
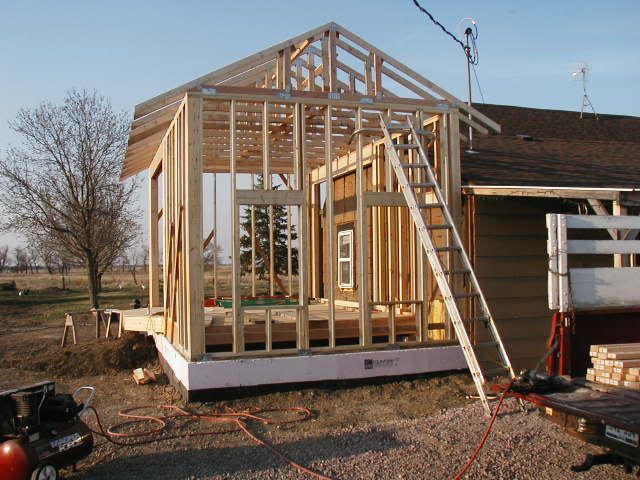
Next step was putting on the deck. That was pretty uneventful. Just putting up trusses and sheathing.

And tarp, cause it looked like it was going to rain. We got pretty good at putting tarp over things during this project.
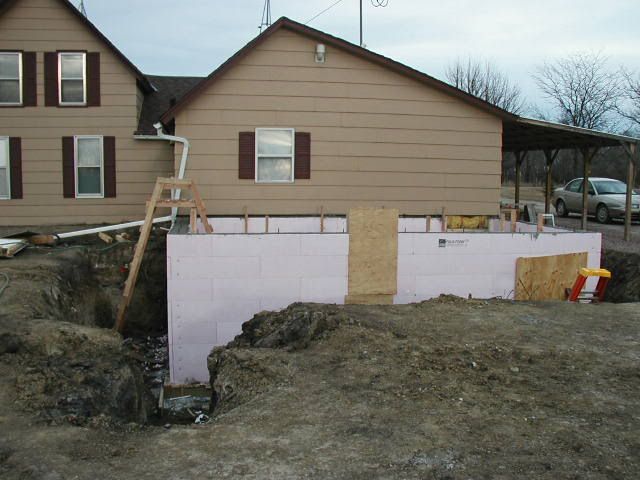
Once we had the decking on, and the walls had a chance to set up, hubby got out the skidsteer and backfilled. He did put down drain tile and rocks before the dirt. While he was digging out for the new sump hole, he hit rocks and lots of water started flowing in. He found the old drain set up for the existing cellar. They only had a layer of rocks, but it seemed to be working. Was a good thing, now the new drainage system was hooked up with the old drainage system.
Our original plans were to put the walls up next. But we got to looking at the basement floor, and decided maybe it would be better to deal with that BEFORE we closed it up more. I figured we’d just be running the shoot in the window opening, but I think this did turn out better.
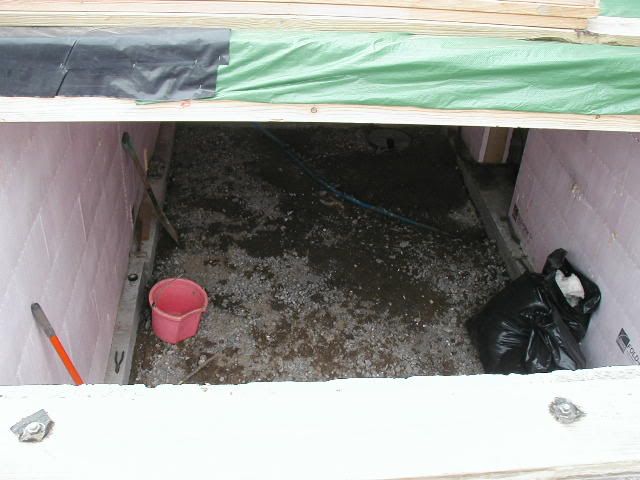
So we called for sand and went to work leveling out the floor.
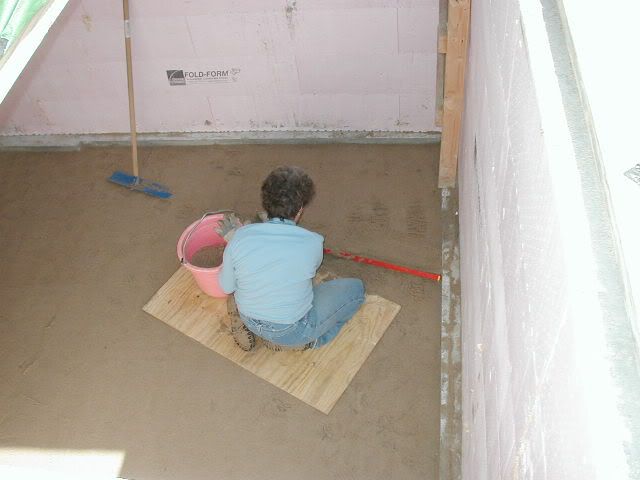
oh, did I say "we", I meant "I" - don't I do nice work. Hubby did help, he used the skidsteer to dump sand in the basement.
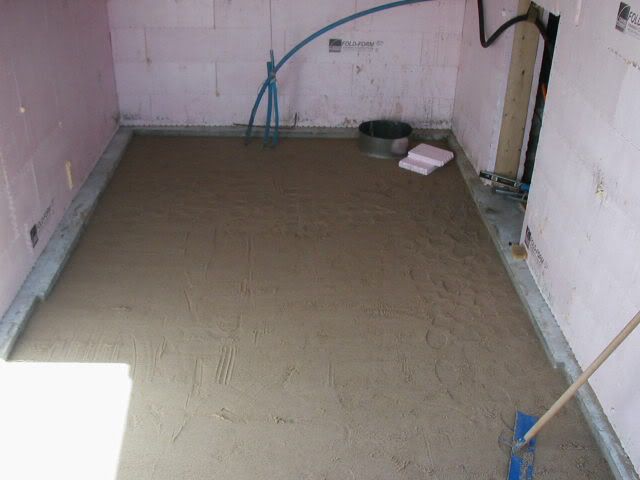
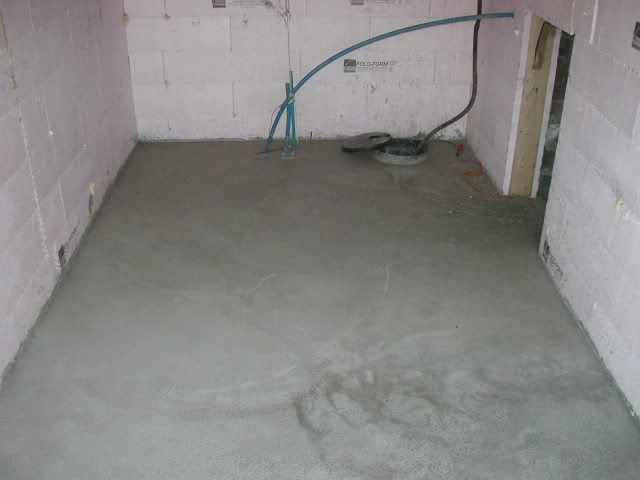
My husband decided he was willing to tackle the cement job. The floor is 22’ x 11’, so not very big. I figured, what the heck, we could never finish the basement because of the water, so even if it didn’t turn out that nice, it would be ok. My husband does a lot of things really well, be he has very little experience with larger slabs of cement. I am sure we did a lot wrong, but in the end we had a cement floor in the basement. It does have a low spot where one shouldn’t be, but over all it sort of slopes toward the drain . . . Hubby was not pleased, and I had to keep reminding him that we decided BEFORE he did this that it wouldn’t matter if it didn’t turn out picture perfect! It was the first week in April when we did the floor. I took that week off work so we could get lots of work done (yea, right!!)
Next we moved on to framing up the walls. We had a lot of work to do removing and trimming back the overhang on the old section. That’s when we discovered the north side of the old section had cedar shingles under the two layers of asphalt shingles. We had some pretty strong winds, and that made raising the walls a bit hairy. At one point I woke up my son (he works nights) so he could come out and help me hold the wall up while hubby nailed it in place.
Got the walls up and started setting trusses. That’s when we realized Menards employees can’t count. I know better than to let them figure anything out for me. We were one truss short, and they were custom ordered. We’ve made trusses before, so ended up building one. We have such a short span, I was not worried about structural safety in this case.
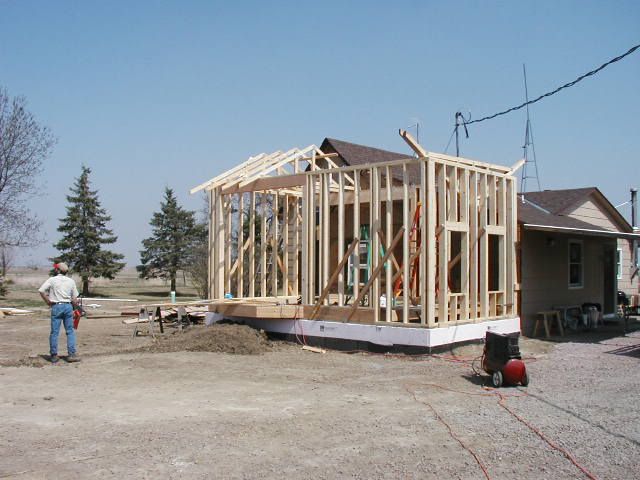
Time for a little side note. Our first plans included extending the house and matching the roof line, then we decided to raise the addition because of the water problems. Hubby wanted to use trusses, so we ended up running the peak of the new roof perpendicular to the old roof. Well, they always say you should look up before you plan things.
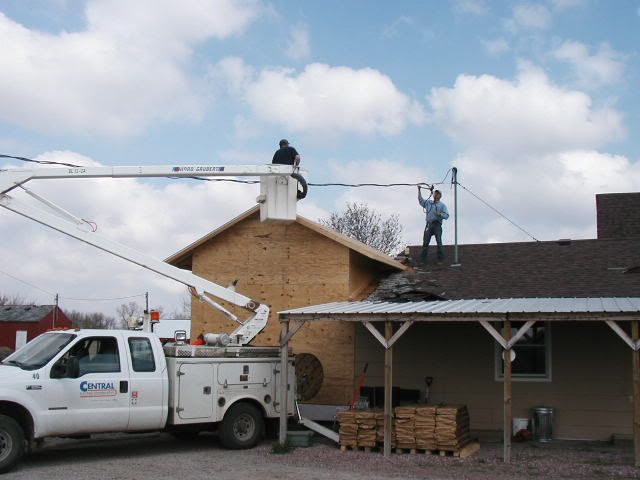
As we were setting trusses, we realized we were getting awfully close to the incoming power line. I think we had about 3’ clearance between the roof and the line – way to close for my comfort. The whole while we were putting up sheathing on the roof, I kept saying “remember the power line.” I think hubby was about ready to grab it just to put himself out of misery.
We decided we needed to get the power line moved, and was best to do it now, before we re-roofed the section were it was now. Underground is the only way to go for me, so we put in a call to the power company. At least this early in the spring, they don’t have a lot of work to do and they were able to come out later that week.
When we first moved in, we waited over three weeks for them to install a new yard light for us. Hubby got tired of waiting, and decided he could do it himself. It started out being somewhat calm, so he backed up the pickup and put the ladder in the bed and extended it all the way up to reach the old light he needed to remove. He got about half way done with the project when the wind kicked up. Not wanting to give up, he hung in there –literally, when the wind gusted he had to hang on to the pole to keep from getting blown down. He’s up at the top, getting mad and cussing out the wind, I’m down at the bottom hanging on to the ladder with all my might, praying that God doesn’t get upset with his language and blow his sorry a$$ off. The more he cussed, the more I prayed, and I was so glad when he finally said “I’m done” and climbed down. Some day we’re going to be too old for these types of stupid human tricks!!
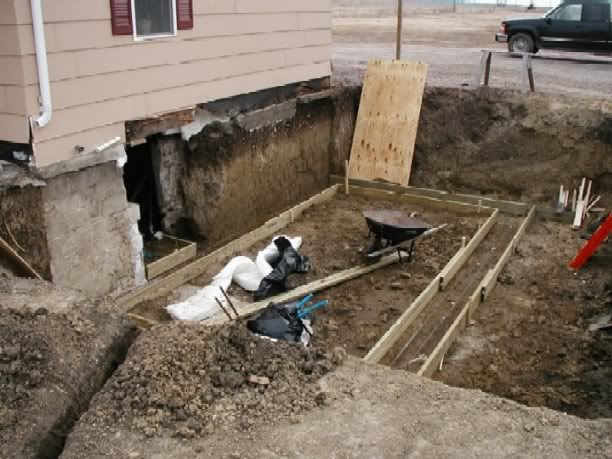
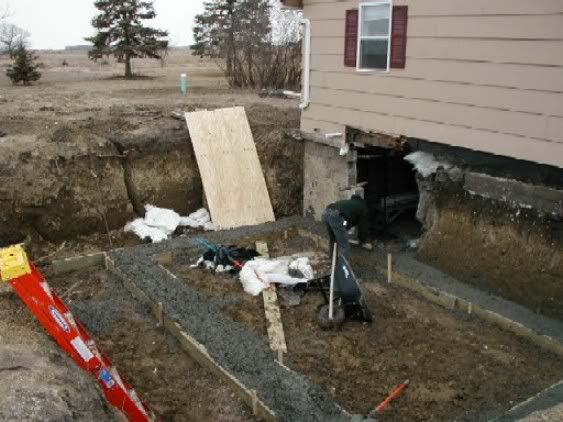
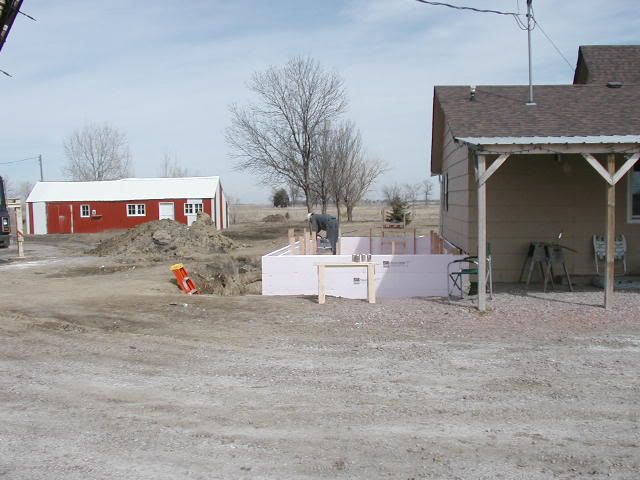
¶ 7:53 PM 0 commentsNow we have a hole in the yard . . . The next step was the footings. This wasn’t too bad. We bought a laser level (self leveling) and feel it paid for itself in getting the footing forms leveled. It’s much easier when it comes to everything else if the bottom is correct.
Anyway, Hubby had a good start, and when I came home from work I helped with the ground work, and the next day he had the forms ready to go.
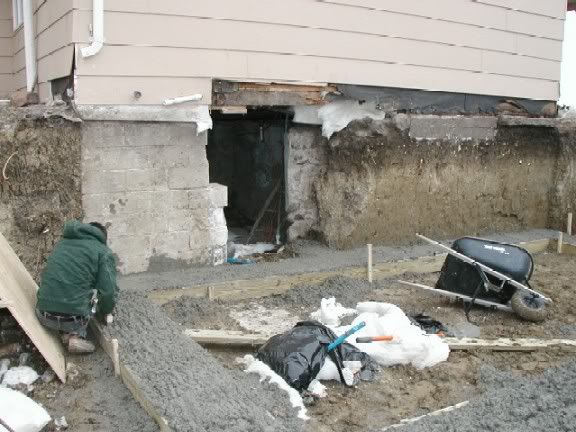
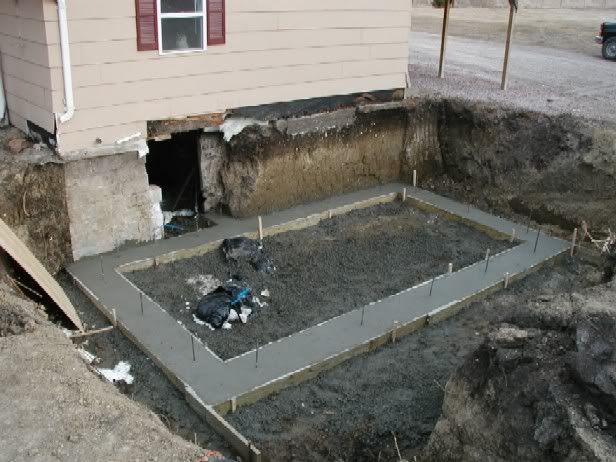
Called the concrete company, and they were able to come right out. Nice thing about doing this in March, most people have not started their projects yet, so there isn’t much of a wait to get concrete or rock hauled. Hubby and son worked on getting the cement finished, and when I came home it was all done (I like it when that happens!).
Son took these pictures, I really was a work LOL!
The insulation is covering up the exposed waterlines. Our plans included them coming up the floor in the new basement, but for now we had to run them into the existing cellar so they could be attached to the existing lines. We didn't hook up the new water trough for the horses until November, so set up a tank with a heater element in it for now.
We made plans to have the foundation poured the next Monday, and I arranged to take that day off.
When we were planning this project, we decided to go with poured foundation walls. Weren’t certain how we were going to do this, and then we discovered the insulated foam forms. Boy, those sure are neat to use, but they aren’t cheap! We ordered them and had them on site before we had the hole dug, so that wasn’t a concern. We did a lot of research and figured we sort of knew what we were doing. Lots of people use these out here. Our biggest problem was we didn’t allow for enough time to get them set up.
We arranged for the concrete and pump truck to be out around
Got busy Sunday morning and things looked good, by late Sunday afternoon we had about 4’ up, and it wasn’t looking so good anymore. Sun went pretty early that time of year, so pretty soon we had the lantern out. We’ve done quite a bit of building by lantern light. Remind me to tell you about the time my husband dropped a 14’ 4x6 on my head . . . But that was another building in another state LOL!!! We do a lot of stuff by guess and by gosh, just in case someone reading this might think we actually know what we are doing . . .
My son works nights, and has Sunday night off, so he got up around
He was just finishing up when the pump truck showed up. Hubby handled the shoot, and away they went.
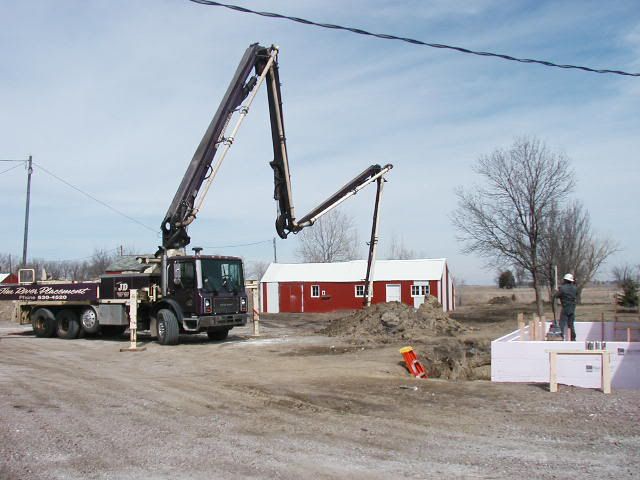
We shut the power off to be safe, and they went up in about 2’ lifts at a time. One cement truck got us about half way up, then we took a break while we waited for the second load. Going around the first lift with the second load and we had our first blowout. Now we’d made the little clamp things that the manufacturer recommended, but they weren’t going to work in this case. Grabbed a sheet of plywood, turned the power back on and cut it in half, then screwed it to the forms over the break. Almost forgot to do both the inside where the break was, and the outside since there was no support with the inside form gone. That was the only break, and we got the rest done without much trouble. I worked inside getting the cement that had poured out the hole spread around so it wouldn’t cause us grief when we did the floor, and hubby put in the anchors and smoothed the surface. It was a LONNGGG two days, but we had walls!
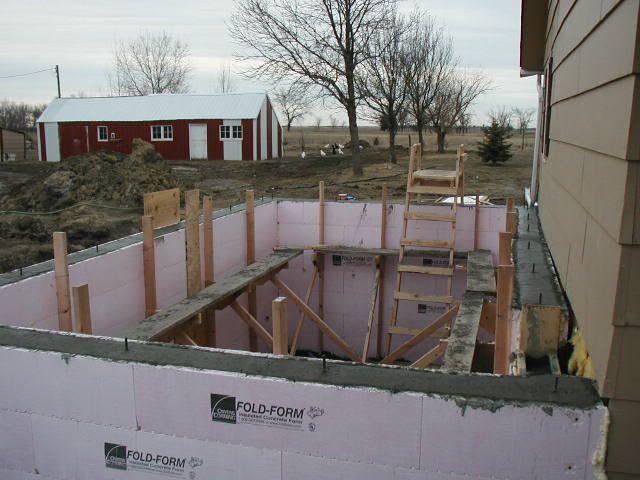
This is were the fun begins. . .
We made arrangements with the Contractor who put in the septic, to come and dig the hole for the addition. The weather had cooperated, and things were ready to have him come out March 14th. We also planned on putting in new outgoing waterlines as the old ones were underneath were the new addition was going. Based on where the incoming line was in the basement, we thought it angled to the house, so it would not be under where we were digging.
This picture shows the door to the old cellar
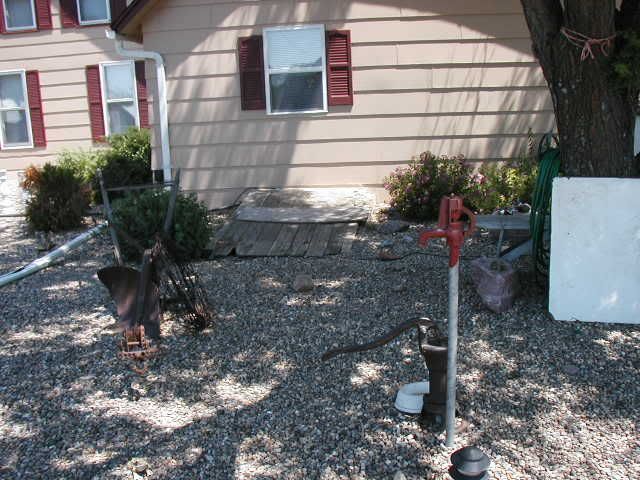
We had already removed the landscaping material (rocks and plants) before having the septic done, and only had a tree to cut down. My husband has cut down trees before, so this was not a big deal. My husband says he is a “tree hugger”. If he can reach around the tree and touch fingers, he can take it in one pass with his Jonsereds 2071.
The small cellar underneath the bathroom is only about 6’deep, and our original plans including keeping the roofline the same, which meant digging down 8’ from grade. Even after fixing the septic, we were still pumping water out of the cellar on a regular basis - though not nearly as much. Even though we didn’t plan on finishing the basement under the addition, we really didn’t want an indoor pool either. We finally decided that we would only go down 6’ with the new basement, and then have a “step up” (2’) into the new section. Meant changing some plans, but since the old section is rafters, figured it shouldn’t be too hard to deal with. It did mean we couldn’t match the old roof line. We played around with the software and decided if we ran the new roof perpendicular to the old roof, we could use trusses and it would look ok (well, it looked ok on paper . . .).
I had to work the day the contractor and crew came out. Around
It might seem strange to some that we live in the country and have piped in water, but the water out here is not really potable. Very acidic. I think it’s safe to drink, but stains clothing and tastes like rotten eggs. I’m use to MN and WI, where well water is usually very good, but out here people celebrate when they finally get hooked up to the Rural Water System.
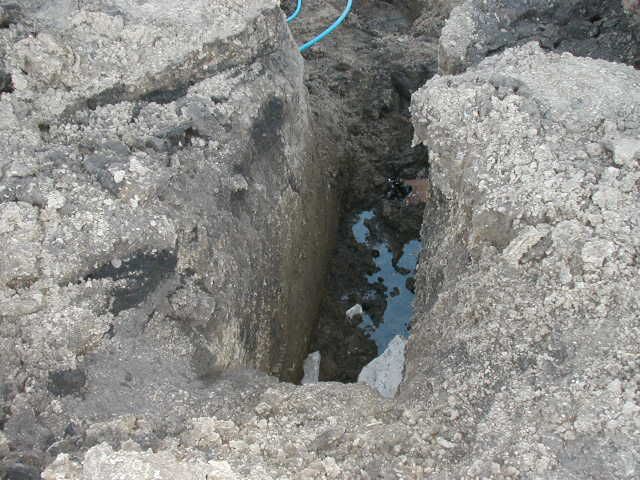
Back to the story - The first thought was to dig back to where the PVC was tied into the plastic line, but they went about 8’ and decided that was just too much work. The contractor had all the tools and supplies on site to put in waterline, so they just ran a new line from the pot. We had not expected to end up with exposed waterlines in the middle of March in
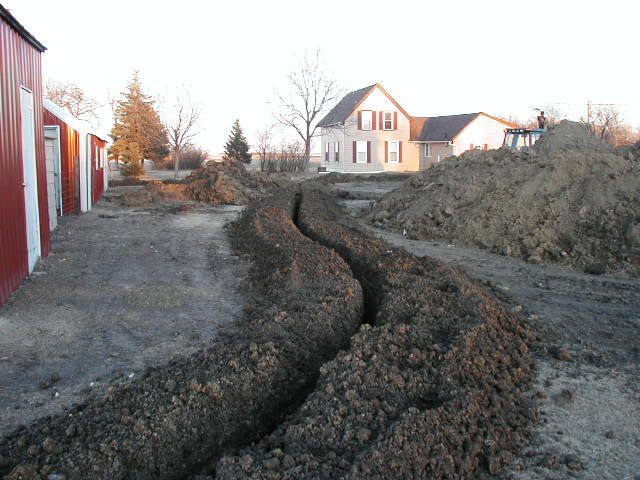
It froze overnight, so back filling the trenches ended up being done mostly by hand, but now we had a hole in the ground.
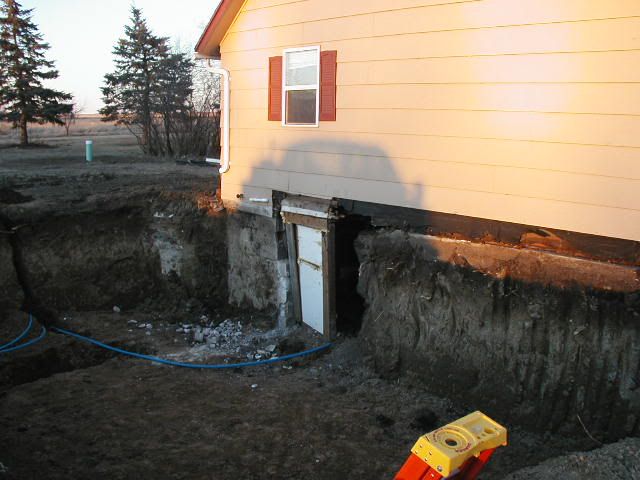
Unfortunately, we also had a hole in the side of the house. When they went to remove the old cellar access hatch, they took a chunk of the foundation with it. We patched the hole with plywood, and left the water running at night to keep the pipes from freezing. Over all, we were happy with the work the contractor did, and now we were ready for the next step, the footings.
¶ 7:51 PM 0 commentsThough it may not seem like it, I am actually leaving quite a bit out LOL!!! Hardly mentioned the electrical! Ok, where was I?
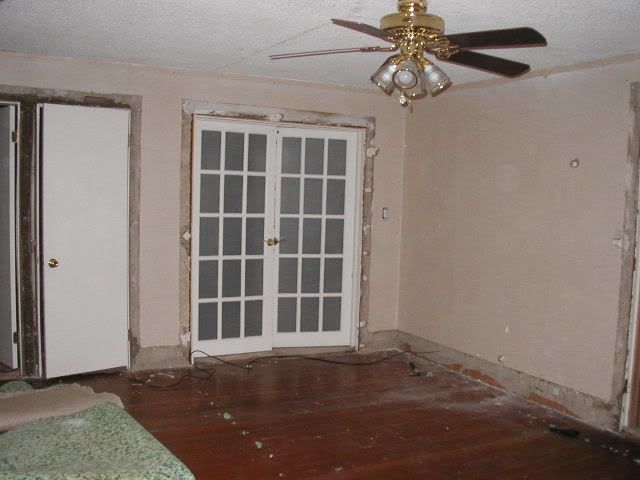
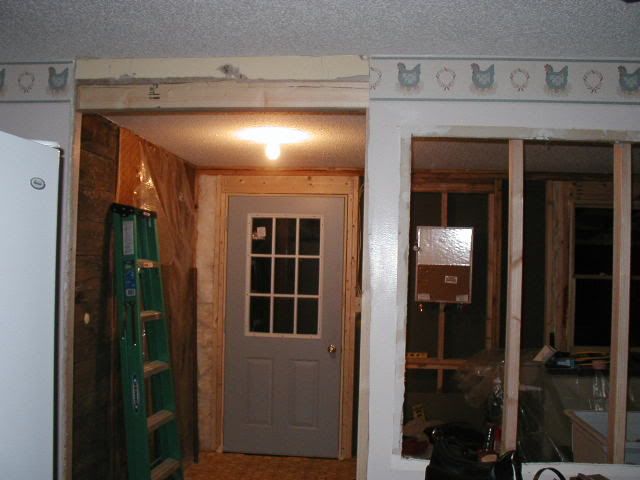
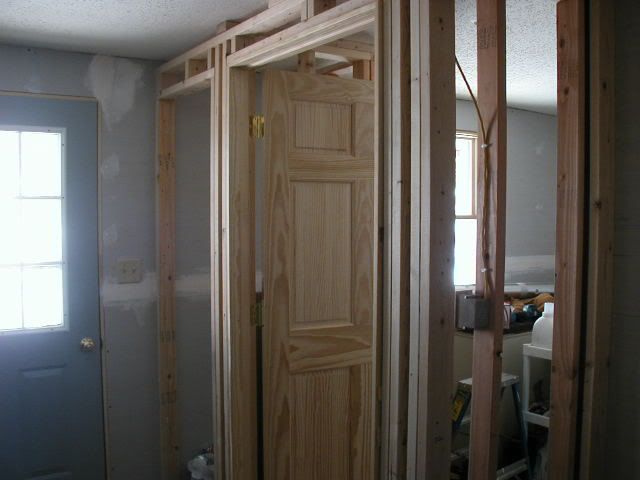
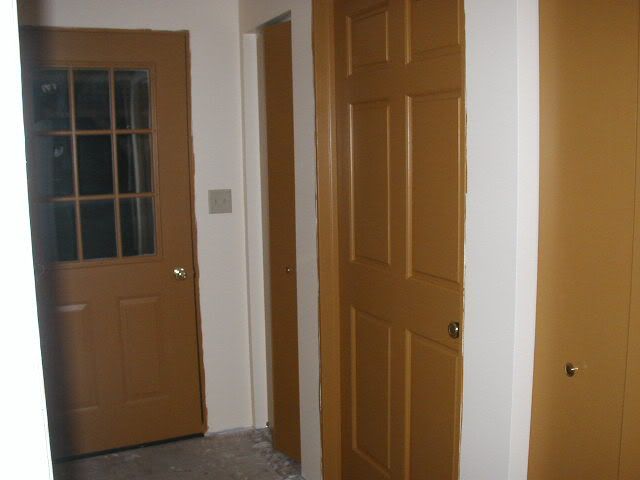
With the new door installed, we got a better idea of what the space was going to be like. We also realized that if we moved the door to the front porch, we could segregate the kitchen area a bit, and have a breakfast bar, another neat thing my husband always wanted. Unfortunately this put the flow of traffic too close to the wood stove. We tried several different scenarios as to where to put the wood stove, and even though we already had the chimney opening framed in, we decided to move the wood stove. It’s not that hard to patch a hole in the wall, even if it is an exterior one.
The next idea was to put the stove in the front porch. But then it wouldn’t heat much of the rest of the house, but if we opened up the wall – say about 7’ wide . . . Hey, that would work! That meant not only did we need to open up more of the old living room, we needed to start on the porch also.
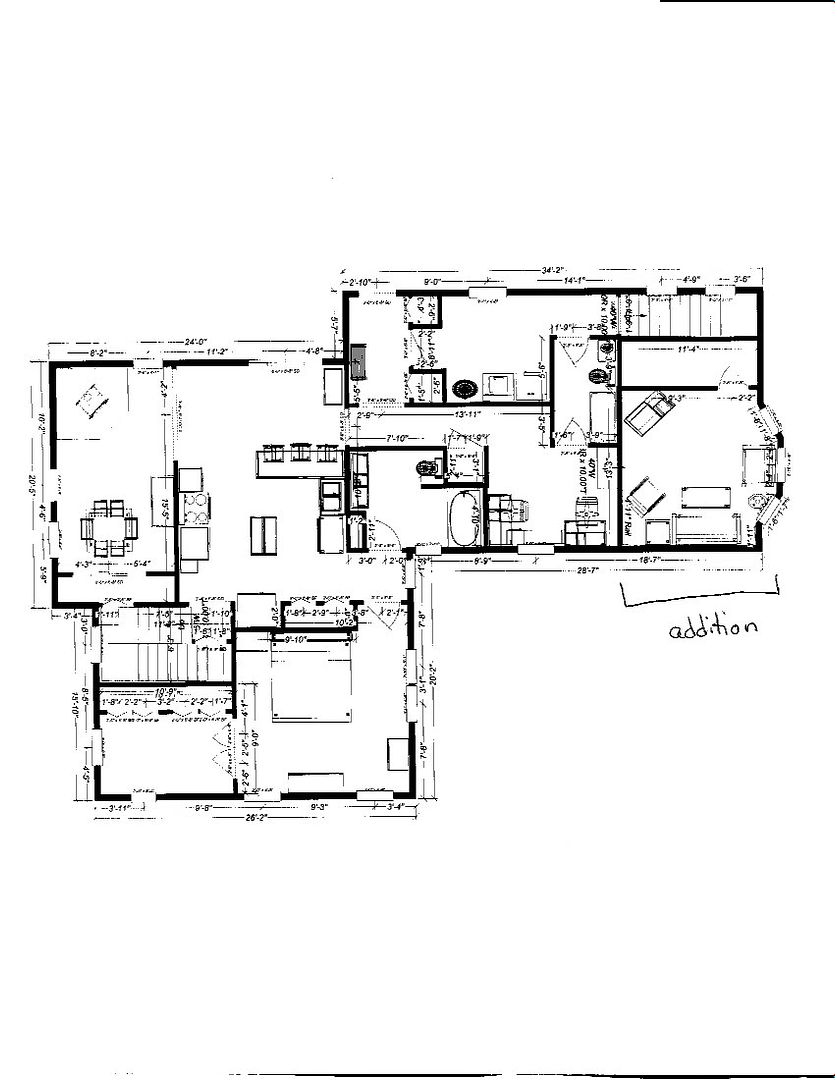
This was the basic layout, showing the larger opening into the den, and the location of the woodstove in the corner. This "version" shows the den being the dining room, but we changed that later. The laundry room/entry way is what we ended up with, but there have been changes to the bathroom layouts. This is also the plan after we started on the addition, and had to make major changes because of - well, I'll tell you about that when we get there.
I had taken the week of Thanksgiving off – promised to do some hunting with my husband, so that seemed like a good time to get started. I figured if we worked hard, we should have the kitchen done by the time we started the addition in the spring (wishful thinking on my part . . .).
Moved all the living room furniture out of the living room. The small bedroom upstairs was now full of boxes, the small bedroom downstairs got turned into the TV room. And we moved as much into the bedroom as possible (wall to wall furniture). We crammed the computer desks next to each other in the porch, and went to work.
I hung plastic up to keep the dust out of the rest of the house (as much as was possible). Removed the carpet and found a nice pine floor.
Hubby said he didn’t want to save the floor, so I didn’t worry about dropping chunks of the ceiling on it.
We literally hauled two tons of debris out of that one room – the dump charges by the pound.
We have found that things work a lot better if I do the demo work. My husband does not have the patience for that (or painting). Did you know you can shred a 2x4 with a claw hammer if you get mad enough? My husband is very good at a lot of things, but not that.
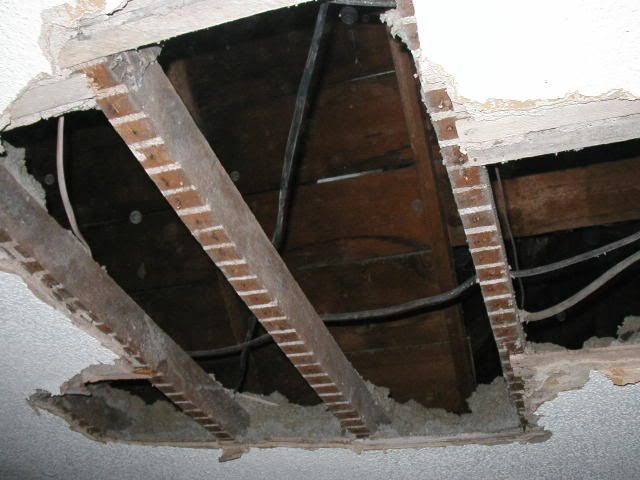
We had to replace a couple of the ceiling joists, as they had been cut and patched around old chimney openings. This roof had two of them.
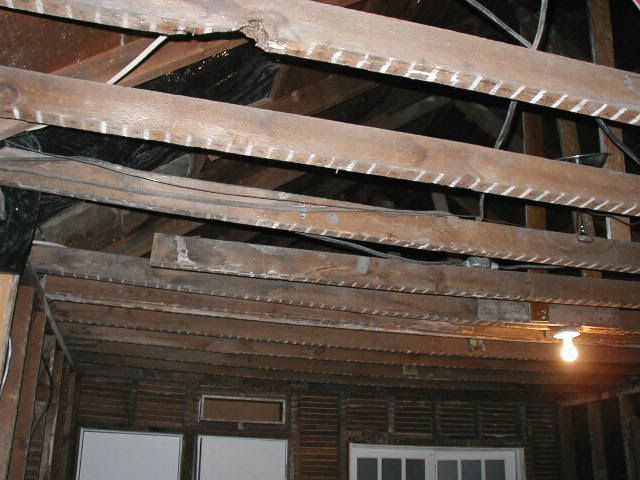
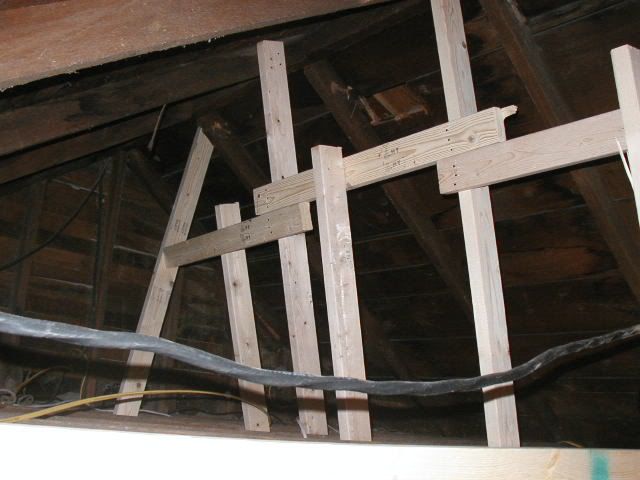
Once we had that done, we had another problem. The old joists were sagging, and new ones were not . . .
If I had to do it over, I’d replace all of them, but at the time we decided to brace them back up. We nailed braces between the rafters and the joists, and used a 2x4 to force the joists back up in position. It actually worked quite well.
Keep in mind, it was now December in
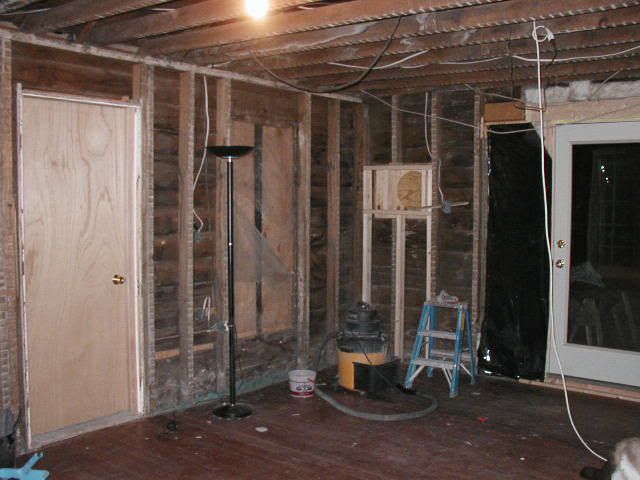
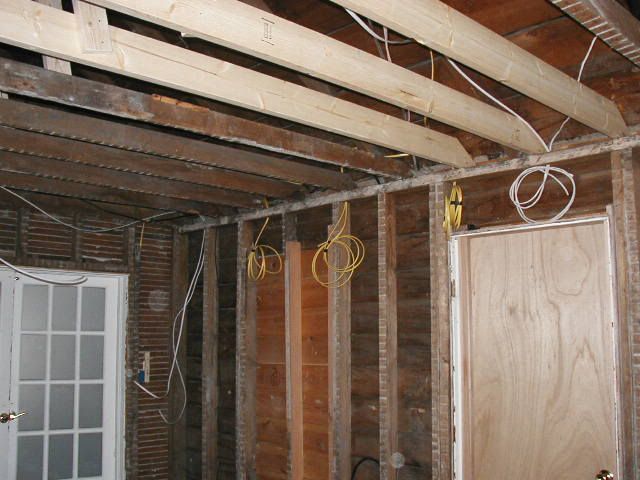
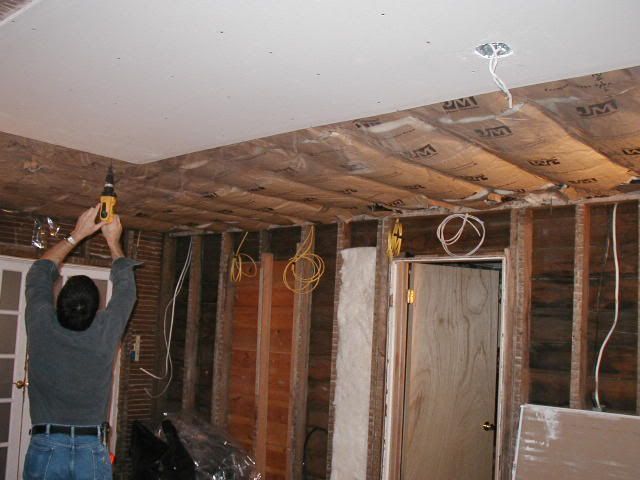
Once we had the joists in place, we put in the electrical and insulation, and put up sheet rock.
The wiring in this place is something else – We will eventually have it all replaced. Since the house was originally built without electric, most of the wires go across the ceiling and down the wall, not across the walls. That makes it easier for moving doors around.
The next step was opening up the walls. The doorway between the old kitchen and the living room turned out to be sheet rocked over door frame (with no header, of course) Was only about 30” wide, so we planned on making it wider anyway. That one wasn’t a big deal, but opening up 7’ in the opposite wall was a bit more challenging.
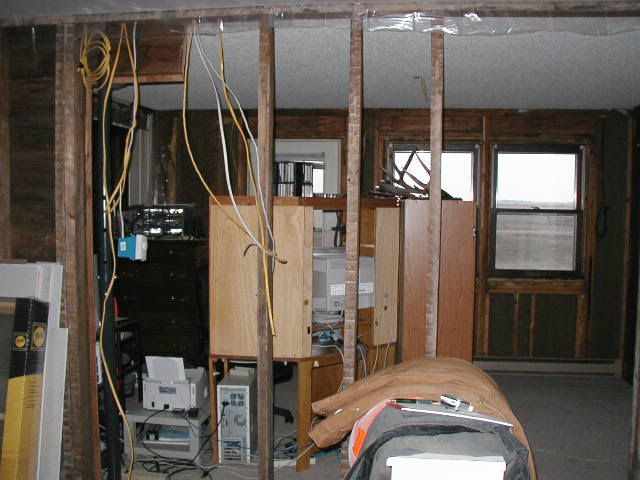
We had to remove the studs, and then fix the floor opening. The house is balloon framed, so we had to build a base for the jack studs to stand on. We used two screw posts to hold the roofline up while we removed the studs and prepared the opening for the header. We had everything ready to go, then removed the posts and pounded the header in place. We get one end up on the jacks, then stick one jack under the other end at an angle (so it will fit) and then pound it until it is upright and in place. The roof line had been sagging for some time, so it took a bit, but we finally got it.
Boy, I’m getting tired just thinking about all the work we did! Once we had the opening done, we got to work on the corner of the porch for the wood stove. This meant taking out the windows on the east side, and putting in a smaller one on the south side. We removed the sheetrock to the door, and finally found our first REAL HEADER! They almost had one over the east windows, but they had a stud going up the middle between the two windows, so though the outer edge of what should have been a header was sitting on jack studs, the inner edge was supported by the window frame. No wonder those windows didn’t work right!
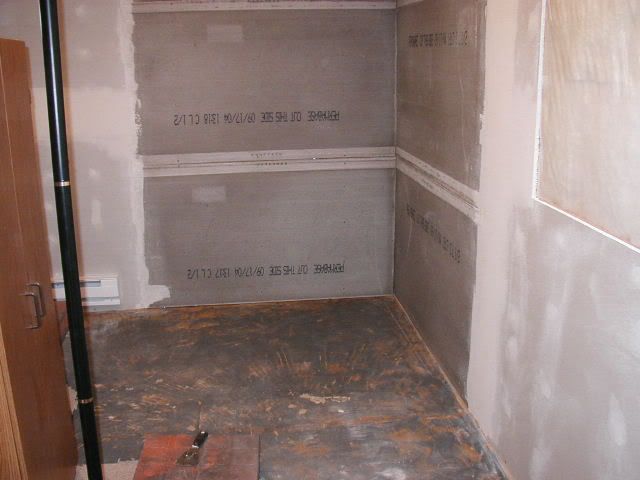
We put cement board on the walls
and Z-brick
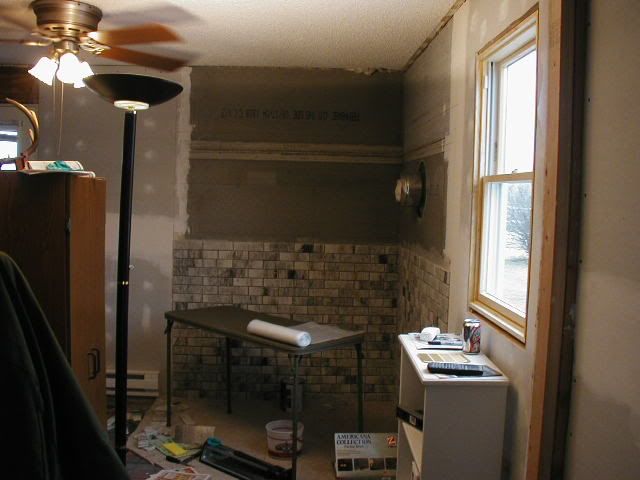
Put grout up (what a mess!!!!) and then spent a couple of days trying to get the haze of the brick. Won’t do that again. Got it looking decent, then put the cement blocks on the floor. Then my husband took over (he also does not do tile). He put the stove in place and installed the chimney. Spent about $500 on the stove and another $800 on the chimney! That double insulated pipe is not cheap!
But it does look nice - and was a house saver a little less than a year later (Dec 2005) when we were without electricity for 10 days.

When we started this project, we expected my husband would be around a lot (works seasonal). Then his boss got a late season job and hubby was working out of town, only home on the weekends for the entire month of December. It was mid February before we were able to use the wood stove for the first time.
We were also working on the walls in the laundry room at the same time. Here are some pictures of the progress in the laundry room.
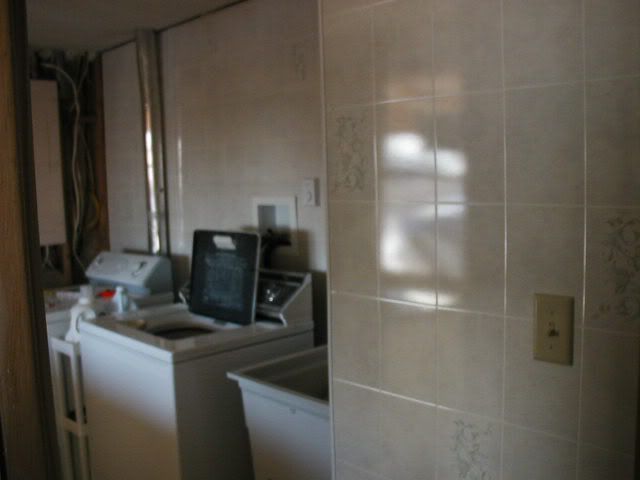
We were making progress and getting closer to our March 15th date for starting the addition . . .

